Tutorial Rolisteam en fr
Rolisteam
![]()
Rolisteam is a free virtual table software. Pen and paper Role playing games are traditionnaly played around the table. Virtual table software seems to be the right solution to overcome difficulties playing in real life.
Rolisteam is also multiplatform software (Windows, MacOS and Linux). Download it here: https://www.rolisteam.org/download.html then install it on your computer. Rolisteam provides many features to deliver a better game experience (such as: maps, images, dice roller, charactersheet, background music).
Rolisteam is available in several languages: english, french, spanish, german, portuguese, hungrian, dutch, romanian and partially in turkish.
Now, Let’s explain how to use Rolisteam. Many screenshots illustrate this tutorial to make it funnier and easier to understand.
I – Start and Settings
When you start it, Rolisteam appears, and in front of it there is the connection panel. This panel allows you to add and set your connection profile. You must set the values correctly to make sure you connect to the right game. A “Player” profile requires you to define your player character as well. This panel may store several connection profiles.
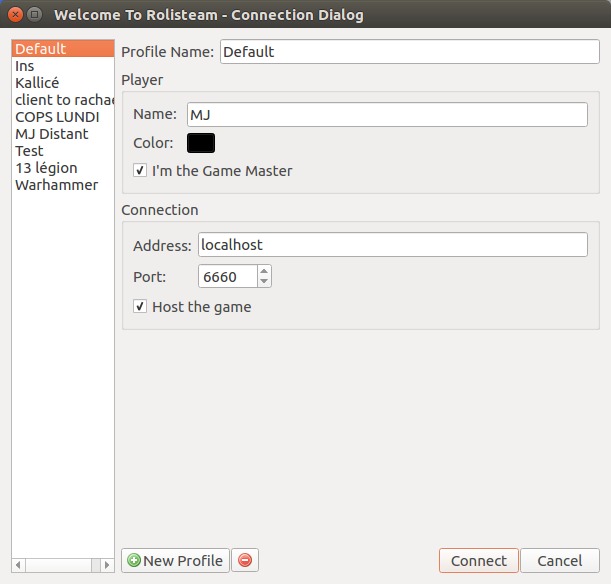
Change the default profile or create another one. We recommand to set a meaningful name. It makes it easier.
For example, I use to play as GM on Wednesday and as player on Monday, names of my profiles are: Game on Monday, Game on Wednesday.
There are four connection mode in Rolisteam:
- Host and GM
- Client and GM
- Host and Player
- Client and Player
GMs (Game Masters) have more control and power over Rolisteam than players. They can add maps or images. They control background music and lots more stuff.
The differences between host and client may appear not really obvious. Hosting the game means that all game players must connect to you. If the hosting Rolisteam is closed, everybody will be disconnected from the game.
Game Master or Player
The Player area is dedicated to describing yourself. You have to pick up (nick)name (it will appears to other players) and select a color. For a better game experience, it is better that all players choose different colors from each other.
The last thing is a checkbox “I am the game master”. Check it only if you are the GM, obviously.
If you are a player, the connection panel allows you to describe your character in the “Character” zone. It is displayed only when you are not the game master.
You must set your character’s name, color and avatar. We recommand you use a square image as your avatar (to look good on vectorial maps).
Host or Client
Host
If you host the game, the server must be on your computer. You don’t need to set an address. You must pick up a port and check “Host the game”. When you are confident about your connection profile, click “Connect”. If everything goes right, the connection profile dialog will disappear and let you access the main application window.
In the notification area (Top right corner), there is a reminder of your connection information. You should give this information to other game participants.
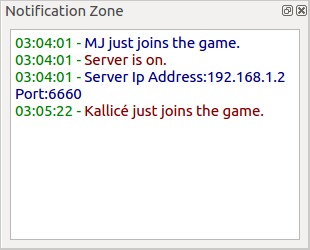
As you can see, the address in our case is 194.250.98.228, and the port is 6661. By default, Rolisteam use the port 6660. You can change it as you want but please avoid port number used by another service.
Chose who will host the game carefully; bandwidth and stability are the main two criteria.
The game experience will be better with a better internet connection. A DSL line is enough to do the job perfectly. Keep in mind, the host must stay connected until the end of game. Everyone will be disconnected if the host quits or is disconnected.
Client
If you connect as client, you need an address and port number to join the game. Rolisteam can access a host by IP address (example: 194.250.98.228) or by domain name (rolisteam.org, games.foo.com). The host must give you that information.
Uncheck the “host the game” checkbox.
Then you are all set. Click on Connection. If it goes right, the connection dialog will disappear and you have access to the application.
First Start
When the connection is set, you’ll see something like this.
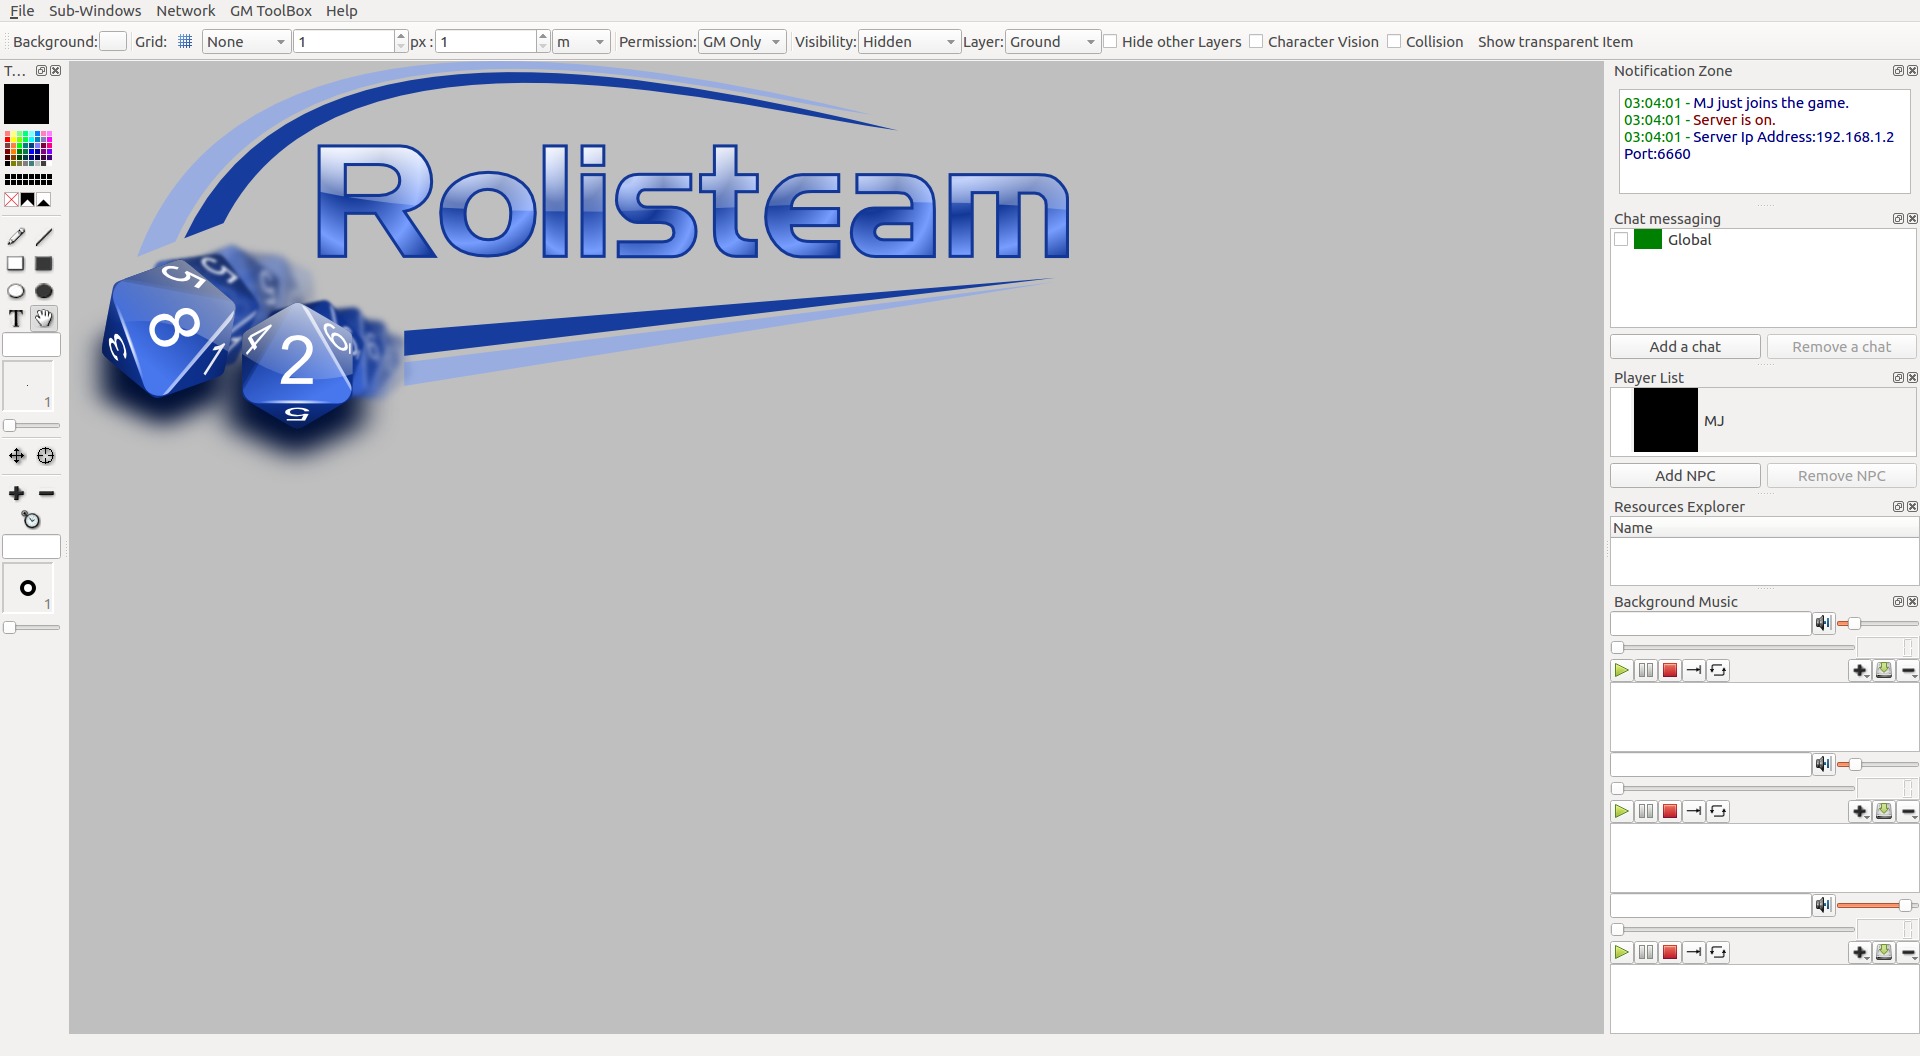
Let’s visit all the panels to see which information you can find in which panels.
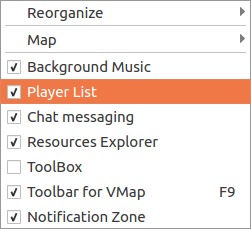
On left and right of the application, there are dockwidgets. You can move those dockwidgets, let them float, or group them together. So you can group them to see important ones at any time. Others can be seen when you want/need them by clicking on their tab. Of course, dockwidgets can be closed (the cross on the top right corner). You can hide/show dockwidgets by using the subwindow menu.
Check Connection Status
To check your connection status at any time, just look at the title bar of rolisteam.
There are, in this order: current story name, software version, Connection status «connected» or «disconnected», connection type (client or server), and the application’s name Rolisteam.

Notification Area
As you have seen, the notification area is useful when hosting the game. It gives you all the information you need to send to other players.
This panel has more features than that.
All the events on the network are logged inside it.
So you can see new incoming connections or a player’s disconnection.
It provides a progress bar for receiving long transfers.
Instant messaging
This area lists all instant messaging windows. By default, Rolisteam sets global messaging (to everyone) and point-to-point connection to each other player.
You can create a chat window and set it with all/one/many/no players. You can talk about your next tactic.
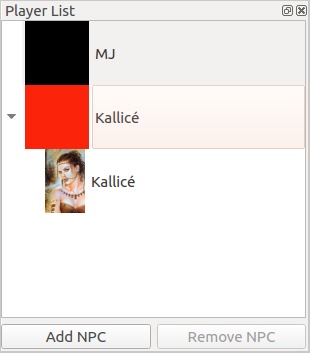
Players list
This panel displays all connected players and their characters. You can expand or collapse the character lists for each player. Character’s avatars can been seen here.
This panel is very important when you are using maps in Rolisteam. We talk about it below in this document.
Audio Players
Rolisteam has three audio players to manage three tracks at the same time.
You may hide them if you need fewer audio players or more space.
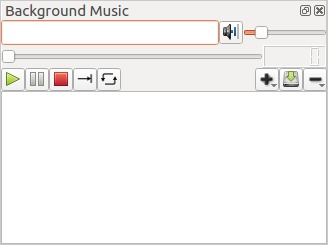
All commands are available through context menu (right-click).
You may load playlists, audio files, or links to streams or remote files.
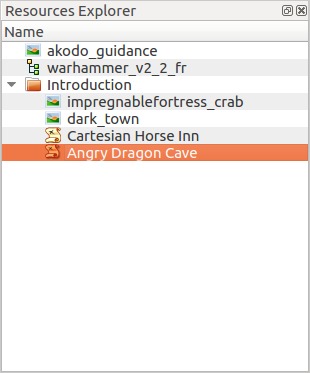
Resources Manager
The resources manager keeps track of all files you have opened in rolisteam. It provides a way to re-open them really quickly. You may sort files into folders.
Play with Rolisteam
Now, you know each panel of rolisteam. We’ll focus on features and how to use them.
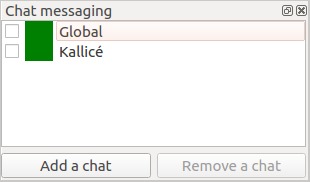
Instant messaging
To open chat messaging, nothing simpler: you have to check the chat you want. It is useful to open «global». You can chat with all other players. You can chat only with one other player at a time.
If a chat name is blinking green and red, it means you received a message.
You may add a new chat with whoever you want, whenever you want.
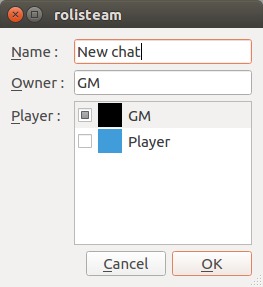
Add new chat
On the bottom, there is a button to add new chat.
A chat has a name, owner, and participating player lists. The owner is automatically set. You can chose all the other parameters.
Just click on “Ok” to validate.
What can we do in the chat window ?
The main feature is obviously to send messages to other players. You can be identified as yourself or as your character. It is usefull to split in-game chat and ooc-chat.
Rolisteam converts all http address to clickable links.
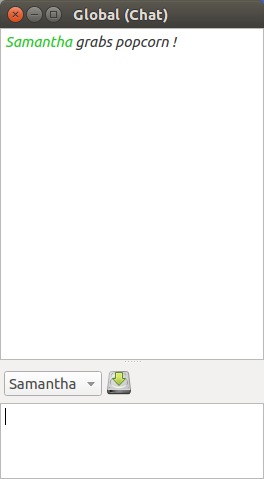
You can describe your character’s actions with the command /me followed by the action description.
Exemple:
/me draws her sword and adopts a defensive stance!
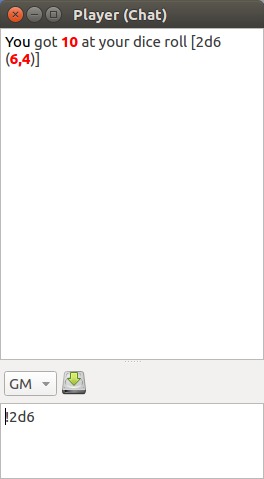
It appears like this:
You can easily resend messages thanks to message history. Just press up and down to navigate inside the history and then press Enter to resend the selected message.
Context menu reachable features
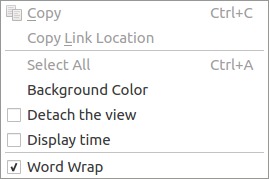
Chat windows have 3 features that can be reached with the context menu:
- You can change the background color of that chat window.
- Chat windows can be popped out of Rolisteam. It can provide better control of the workspace.
- You can display timestamps on message reception.
Roll some dice
The chat window is also where you can roll dice by sending commands.
Rolisteam embeds a powerful engine based on generic operators.
Those operators can be combined to make computations in respect to game mechanics to give you an easy-to-read final answer.
To roll one die with 6 sides, the command is: !1d6
The exclamation mark is important: It marks the beginning of the dice command. It can be replaced by some other characters.
& marks a secret command. Only you can see the result.
# send command to the GM (and only him/her).
- &2d6
-
2d6
Rolisteam can roll any kinds of dice.
- Roll die between 0 and 9 : !1d[0-9]
- Roll 20 dice with 100 sides : !20d100
- Roll die and add 4 to the die result : !1d20+4
- Roll four dice, and the result defines how many dice with 10 sides it will roll: !(4d6)d10
- Roll 6 dice with 10 sides, they explode on 10 and we keep the 3 best dice: !6d10e10k3
- Math expression: !5-5*5+5
The result is always displayed in red for better readbility.
Rolisteam deals with many operators; you can find a complete list on this web page. There are examples as well.
To share and find game specific commands, please go to Rolisteam contact page or Community macro list.
Dice Alias (or how to make your life easier)
Complex systems may require complex and long commands. The alias system is dedicated to help in this case. It provides a way to simplify commands.
Let’s see this example: !6d10e10k3
This command implements the Roll & Keep system from «Legend of the 5 Rings».
It’s painful to write the command every time. A shorter command will be appreciated and more practical.
To do so, Rolisteam provides aliases. To write a clever alias, you have to think about few points.
First, identify the changing part of the system.
Does the dice number change?
Does the difficulty threshold change?
etc.
Those are the questions you should ask yourself.
In our case, the rolled dice and kept dice change.
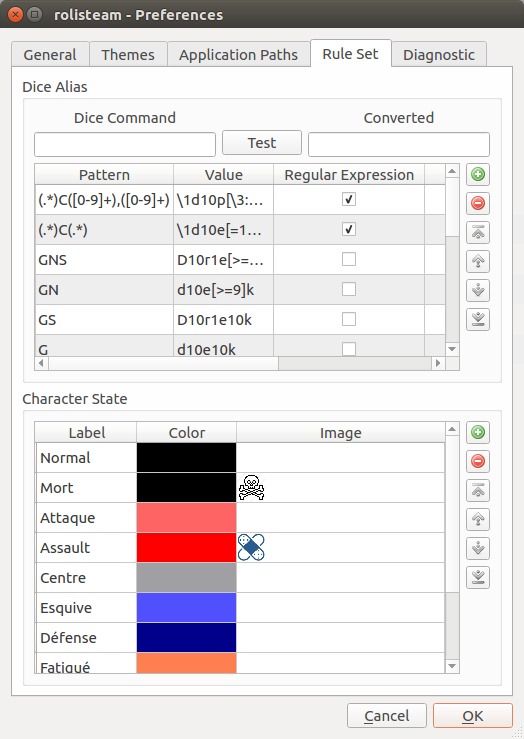
So, you can define an alias in the preferences dialogs.
Alias: K => d10e10k
how to use it:
- !6K3 = !6d10e10k3
- !8K4 = !8d10e10k4
There are two kinds of alias: Alias by replace (like the previous example) Alias by regular expression. Please, take a look at the documentation to get more information about aliases.
Share Image
Every one can share pictures with all others. The picture then appears on everyone screen. Each user may hide it by clicking on title bar. It can be shown again by using the Subwindow Menu.
The GM or the picture owner may close it definitively (menu file > close or keyboard shortcut Ctrl+Echap).
To share the picture, you can do it through the menu: File > Open > Image, or drag and drop it on the main area.
It is also possible to share images from the internet.
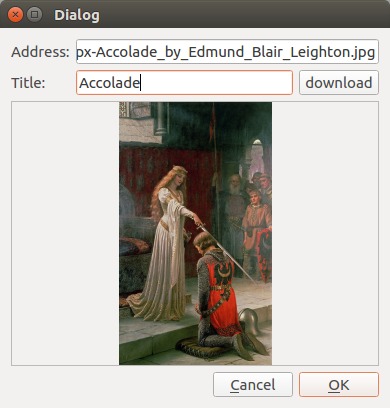
Share image from the Internet
It is really easy, just click on File > Open > Online Image
Maps
Since v1.8, Rolisteam provides two different kinds of maps: Bitmap or vectorial. These are based on two different technologies and concepts. With “bitmap” map, items are painted on the map. For vectorial maps, items are “dropped” on the map.
The GM is the only one who can create and share the map.
bitmap maps
It is possible to add an empty map. Empty maps have size, permissions and background color. Alternatively, it is possible to open as the background of a map.
Empty map
To open an an empty map, just click on file > new > Map or just press CTRL+M.
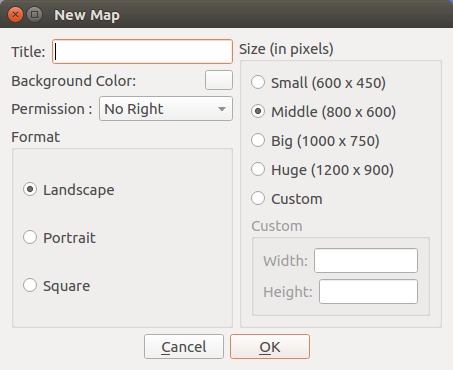
Rolisteam asks you to define many map properties.
- title
- background color
- size
- permission mode
- Format
There are 3 permission modes: No permission, Character and All permissions.
- “No permission” means only the game master may modify the map.
- “Character” allows players to move their character tokens.
- “All permissions gives Game Master rights to all players.
Map with image as background
To open an image as a map background, you just have to click on File > Open > Map
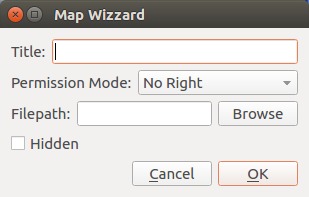
This dialog box allows you to select a background image. Alternatively, it is also possible to load map (.pla) from your computer.
Some map properties must/should be defined, such as title, Permission mode, and visibility.
Check “hidden” if you want your map to appear covered with fog of war. You will reveal the map little by little to your players.
Amend map
When the map is opened, you can paint on it. To do so, Rolisteam provides many painting tools. There are brough together in the map toolbox.
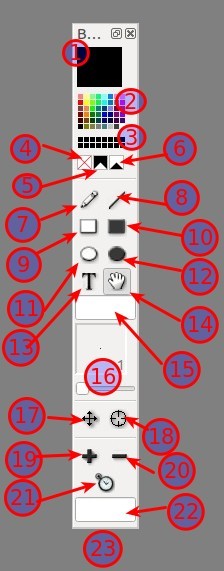
|
1. Current color 2. Pre-defined colors 3. Custom colors 4. Erasing Color 5. Fog of war color 6. Erase fog of war color 7. Pen 8. Line 9. Empty rectangle 10. fulfilled Rectangle 11. Empty Ellipse 12. fulfilled Ellipse 13. Text 14. handle 15. Text field 16. Pen width 17. Move Non playable character (NPC) 18. Change state NPC 19. Add NPC 20. Remove NPC 21. reset NPC count 22. NPC name 23. NPC size |
Map FAQ
1. I need more colors than pre-defined ones, how can I get more ?
It is possible to double-click on the current color to pick a color thank of color selector dialog.
2. How can I changed character orientation ?
When tools 17 or 18 are selected, it is possible with right-click to change orientation. A white mark appears to indicate where the character looks to.
3. How can I change character state ?
Just select the tool 18 and click on character until you reach the proper state.
- Black = Heathly
- Pink = hurt
- Red = wounded
- Gray = dead
- Blue = sleeping
- Green = bewitched
4. What’s the meaning of the handle ?
You can catch the map and move it to display another part. It is very useful when you have small screen.
vectorial Map
Vectorial map has been introduced in Rolisteam v1.8.
It’s a huge change and it will be too long to describe in details all the possibilities.
In this tutorial, you may find usual feature descriptions to draw map. It is recommended to train yourself at least once or twice before use this feature in game.
It may be confusing to discover feature behavior while you are playing.
Another tutorial will be written to details all possibilities about vectorial maps.
If you need more information about vectorial map, please go to the documentation.
Add vectorial map
To create an empty vectorial map, please go to the menu File > new > vectorial map or directly CTRL+V.
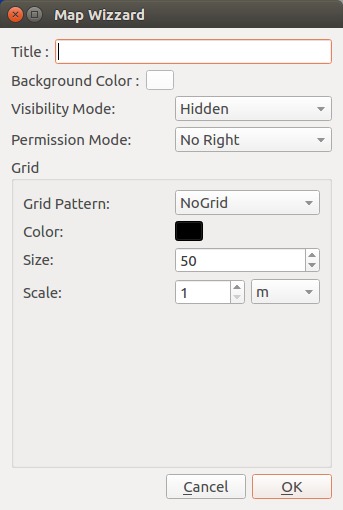
Rolisteam asks values for some vectorial map properties.
- Title
- Background color
- Permission mode
- Visibility mode
- Grid’s shape
When all items are set, just click on OK to make appears the vectorial map.
For your information, vectorial map has no size. The size is infinite.
Amend vectorial map
When map has appeared, you can modify it. There are two kinds of modifications: visual or access.
First, All visual modifications can be performed thank of tools from toolbar or on the map itself.

|
1. Current color Double-click on it to pick up color through color selector dialog. 2. Color palette 3. Brightness selecter 4. Edit Mode In **Normal** mode, you can paint on the map . In **Masking** mode, you can hide parts from players. It adds fog of war. In **Unveil** mode, you remove parts from fog of war. (it does nothing if fog of war is not enabled) 5. Pen 6. Line 7. Empty rectangle 8. Fulfilled rectangle 9. Empty ellipsee 10. Fulfilled ellipse 11. Text 12. Handle This tool selects items and moves them. Rotation or change item size or shape are two possible actions To move items, just click on any item, keep pressing mouse button and just move the mouse (it is a drag and drop action). Modifying size or shape, you have to press `MAJ` and move handler. To select several items at once, just press `CTRL` and click on different elements. 13. Rule 14. Path 15. Anchor Link (child) item to another (parent). Then, if you move the parent all his children will move as well. 16. Pipette 17. Pen width 18. Add NPC 19. Reset NPC counter 20. NPC counter 21. NPC name 22. Opacoty of current item |
Interaction on map
On the map, Rolisteam provides contextual menu. Through those menu, many actions can be run. The menu content depends on the current selection.
If you want to know about all features available from contextual menu, please read this documentation page.
Background music
The GM can broadcast background music.
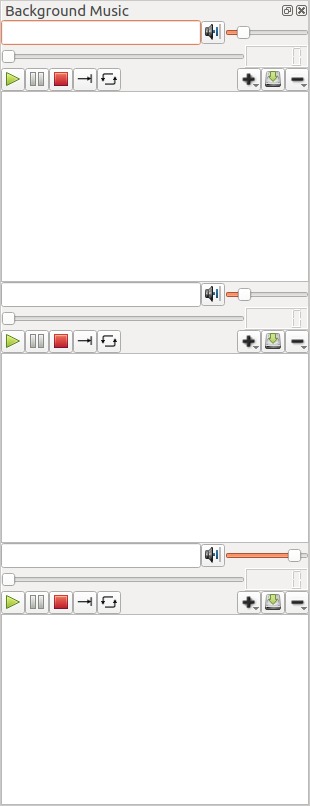
Rolisteam has 3 audio players. They are independant. Each player has standard and expected features from audio player.
Control the playing state with Play, Pause and Stop buttons.
Audio players accept playing mode: Only one, One by one, loop.
* Only one mode plays the current song and stop at the end.
* One by one mode plays the current song and then play the following song. It stops when it reaches the playlist’s end.
* loop mode plays the current file again and again.
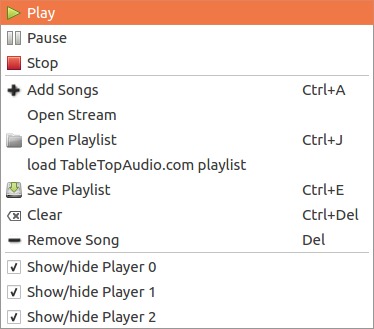
Add music
The button with + symbol is gathering all actions about adding file into the playlist.
One click opens file selector dialog.
One long click shows submenu with additionnal actions:
- Add song to playlist (defaut)
- Open Playlist
- Load TableTopAudio.com playlist
- Add audio stream
Remove Music
The - button means to remove music from the playlist, long click shows the clear function which clear the playlist.
All of these functions are reachable from the contextual menu.
Audio files
Due to legal issue, Rolisteam does not send audio data. It takes care of synchronizing audio players. If you can’t put your files on the internet or to have an audio stream, you have to send files to your players. They have to store audio files in their computers. thanks of some cloud services, sharing and synchronizing directory has become really easy.
Alternatively, TableTopAudio.com playlist works like a charm.
Minutes Editor
It could be useful to record all events about the game. To do so, Rolisteam embeds text editor to take minutes about the game: important NPC, evidences etc. Notes can be saved as html, pdf ou .odt.
Charactersheet
Since v1.8, Rolisteam manages charactersheet. Rolisteam comes with RCSE: “Rolisteam CharacterSheet Editor”. RCSE is the best compagnon when editing charactersheet.
Build your own sheet
To create charactersheet, you have to follow several steps:
- Drag and drop background image for each page of the character sheet and save your work
- Draw field at the right position on each page and save your work
- Generate code and check the result on the “view” tab and save you work
- make modifications on fields (set label and other properties), return to step 3 until you reach the quality you want, save your work often.
- On the character tab, add characters and set appropriate value to each field and save you work.
- Load the result file in Rolisteam and share character with its player.
We will written Tutorial about how to make character sheet.
Using charactersheet into rolisteam
Using charactersheet in Rolisteam is simple. The GM loads the character sheet (.rcs). Then, Gm must share charactersheet (right-click menu) to player’s character. A player may have many characters. A character belongs to only one player. Character owns only one charactersheet.
Where I can find charactersheet
We bring together all character sheets in one git repository, additionnaly, you can discuss about charactersheet on the forum.
Session and story
Scenario brings together all rolisteam supported media into one file. Maps, vectorial maps, images, charactersheet, playlists and minutes are stored inside the scenario. Other medias will come in the future.
Those documents are listed into the resources manager. This panel shows which document is currently part of you scenario. The state of each document is stored as well (Open, loaded and unloaded).
It is important to understand the media workflow. The easiest example is an image. When you drag and drop an image into Rolisteam. Everyone sees it. The image is loaded and open. When you click on the cross on the corner of the window, the image disappears for you only. In this situation, the image is still loaded. To show it again, you can go on the subwindow menu.
To close it for everyone, you must go to File > Close (CTRL+ESC). File state is set to unloaded. however, the file appears into the resources manager as part of the scenario. You can move it into chapter for better lisibility. Or, you can remove it when it is unnecessary to keep it.
Conclusion
This tutorial is now over. Others will follow. I hope it was helpful. I only have to wish you good games with Rolisteam.